
If there is only a C drive on the system disk, you had better shrink it to create more volumes. If you want to extend the system reserved, EFI, or recovery partition on the disk, you need to reduce the C drive to release free space, too. To shrink the C drive in Windows 10/11, you may try either the native Disk Management or third-party software. It is easy to shrink a partition with Disk Management, but it has several limitations. This article introduces how to shrink partition C in Windows 10/11 with both kinds of tools.
Shrink C Drive with Windows 10/11 Native Tool
Whether you forgot to create partitions during installation or bought the computer from an OEM manufacturer, you had better create more volumes if there is only a C drive on the system disk. To do this, both Windows 10 and Windows 11 have a built-in Disk Management tool to help you. However, you may have trouble doing this because Disk Management has some limitations.
To shrink the C drive in Windows 10/11 via Disk Management:
- Press Windows + R on your keyboard, type diskmgmt.msc, and press Enter to open Disk Management.
- Right-click the C drive and select Shrink Volume.
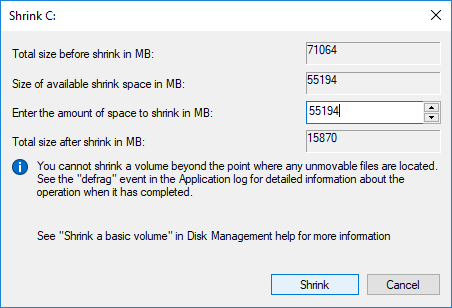
- Enter a smaller amount and click the "Shrink" button.
If there is no filesystem error, it is very fast to finish shrinking.
Cases Where You Cannot Shrink the C Partition
"Shrink Volume" works well in most cases; however, it has some limitations that may bring you into trouble.
- Only NTFS and RAW are supported; FAT32 and all other types of partitions cannot be shrunk.
- It can only shrink a little space if there are unmovable files located in the C drive.
- It cannot shrink the C drive if the available free space is changed before clicking the "Shrink" button.
- It can only shrink the C drive to the left and create unallocated space on the right.
It is better to run professional partition software such as NIUBI Partition Editor, which is free for home computer users. Compared with other free partition software, the NIUBI free edition is 100% clean without any bundled plugins. It doesn't limit any functions except the bootable media builder.
Download the free partition editor, and you will see all storage devices with partition structure and detailed information on the main window.
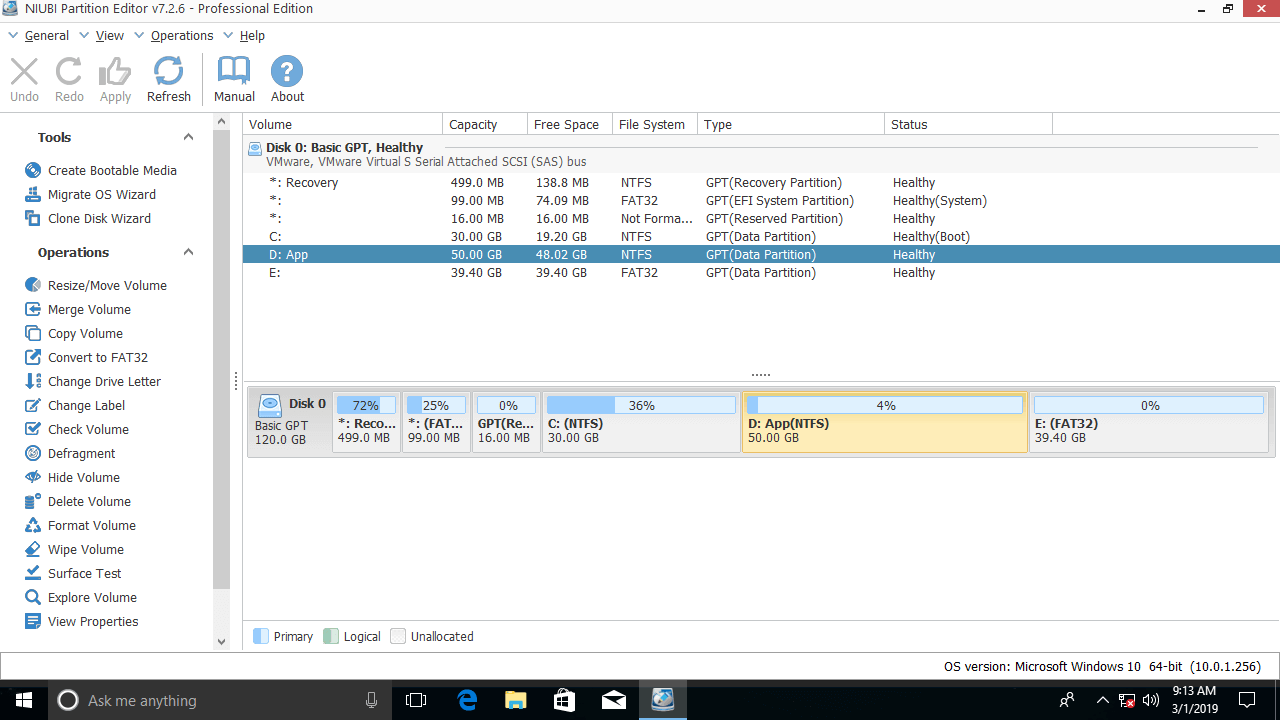
Shrink C Drive to Create a New Volume in Windows 10/11
Compared with Disk Management, you just need to drag and drop on the disk map with NIUBI. Furthermore, you can create unallocated space on either the left or right side. Right-click the C drive and select "Resize/Move Volume".
If you drag the right border to the left in the pop-up window:
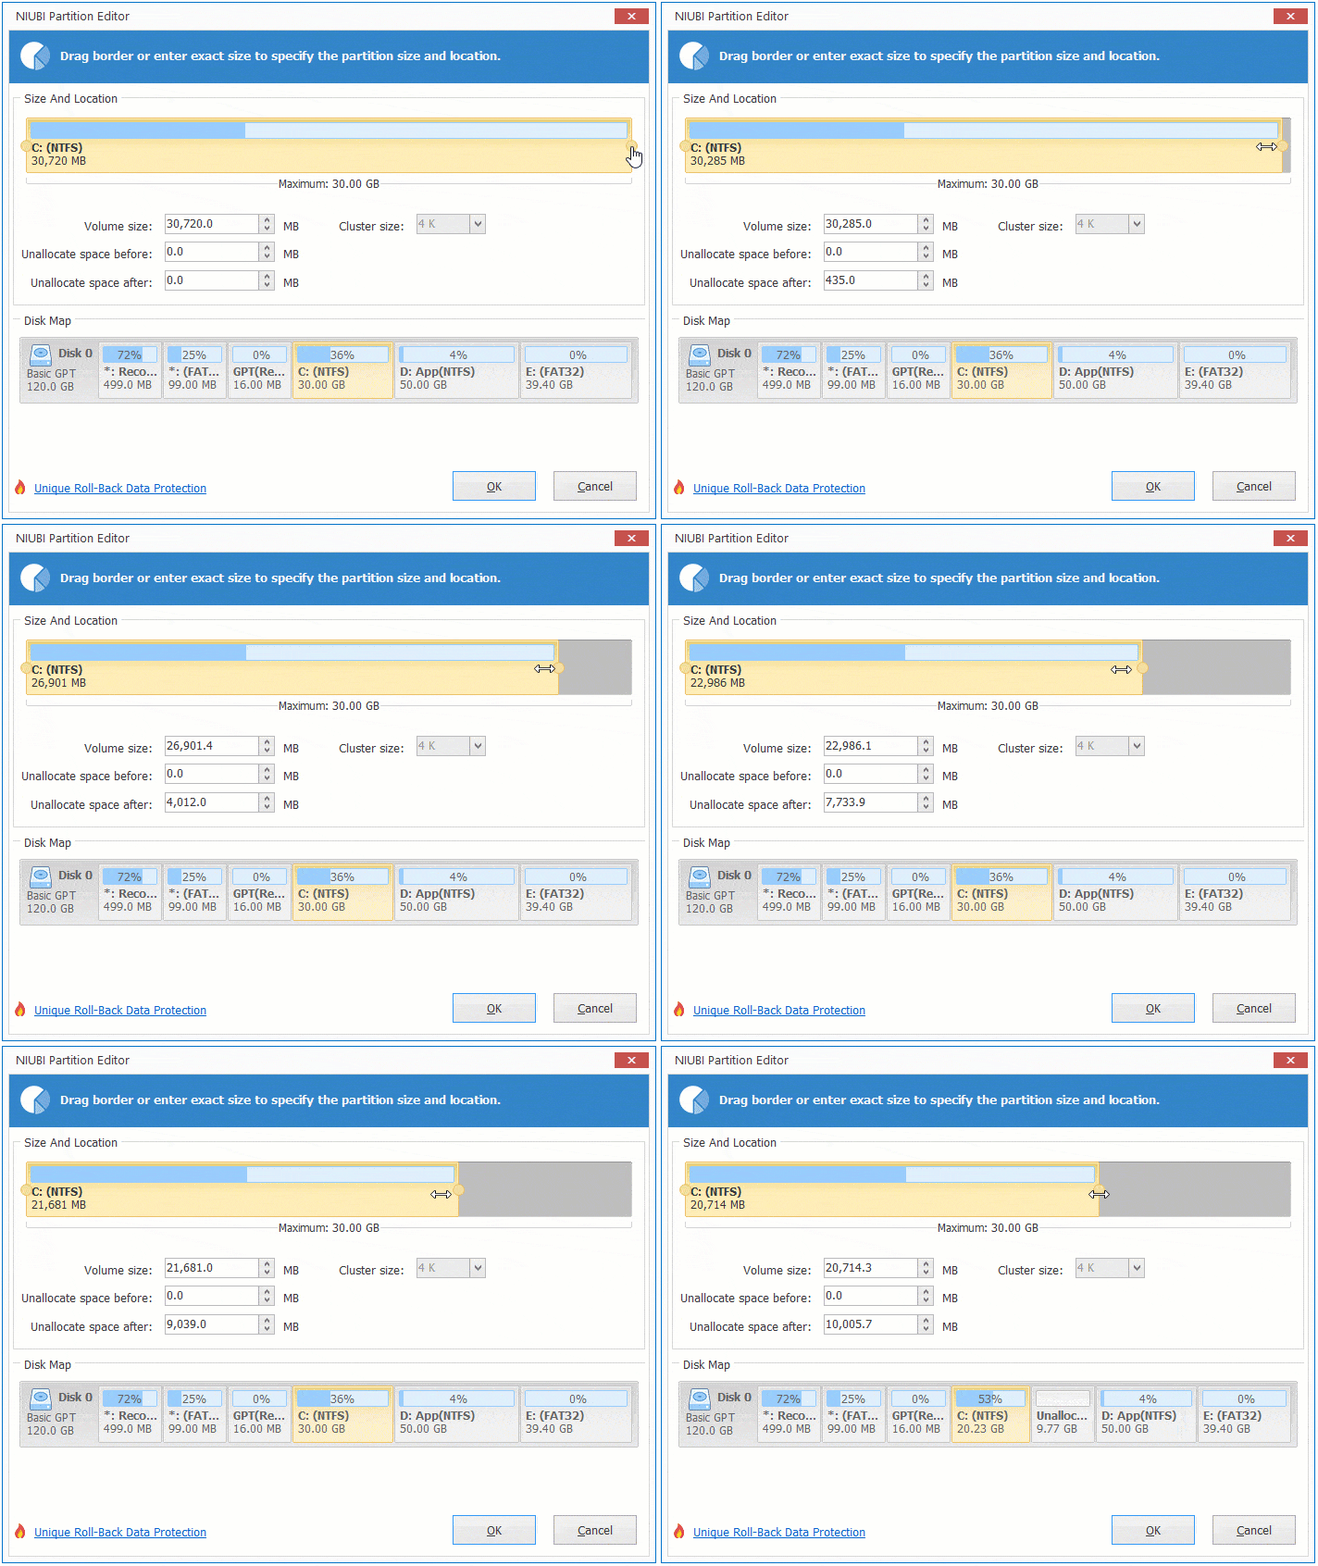
Unallocated space will be created on the right side of the C drive.
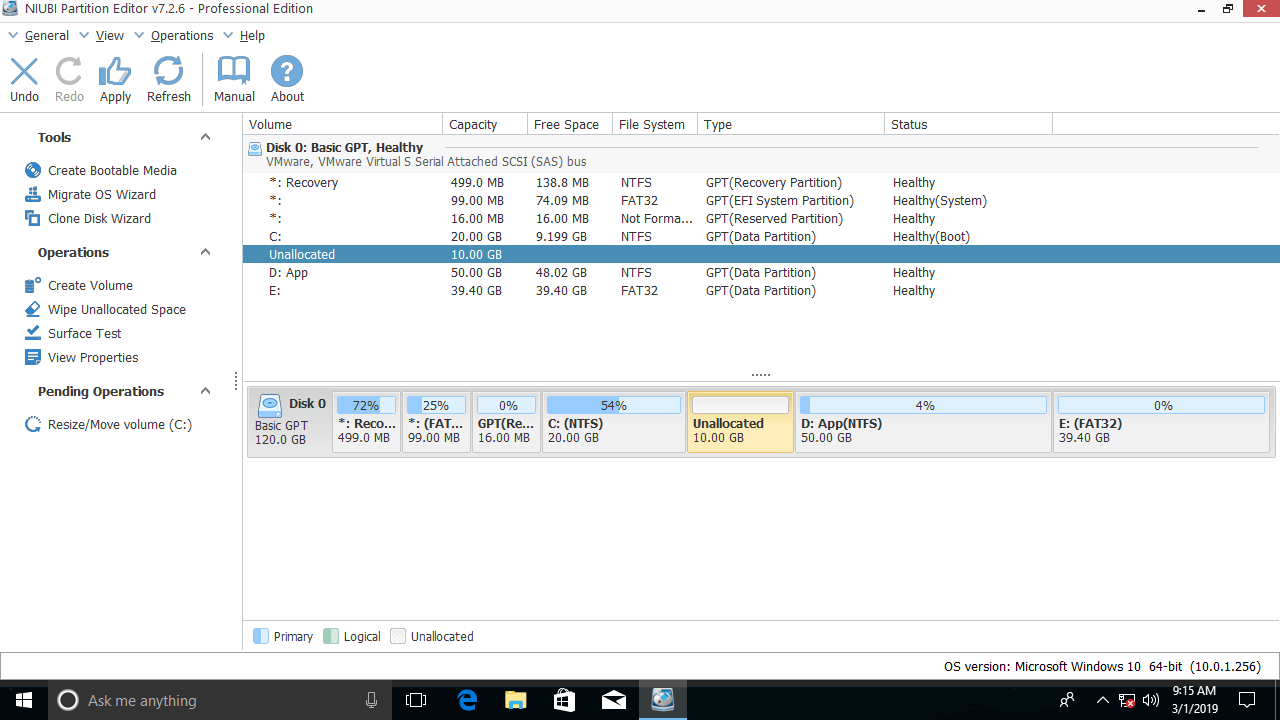
If you drag the left border to the right in the pop-up window, unallocated space will be created on the left side of the C drive.
To create a new partition, simply right-click the unallocated space and select "Create Volume".
Shrink C to Expand the D Drive
If partition D is on the left side of the C drive, you should create unallocated space on the left side of the C drive. But on most computers, the D drive is on the right of C.
To shrink C and extend the D drive in Windows 10/11:
- Follow the steps above to shrink C and create unallocated space on the right.
- Right-click drive D and select "Resize/Move Volume" again. Drag the left border to the left to merge this unallocated space.
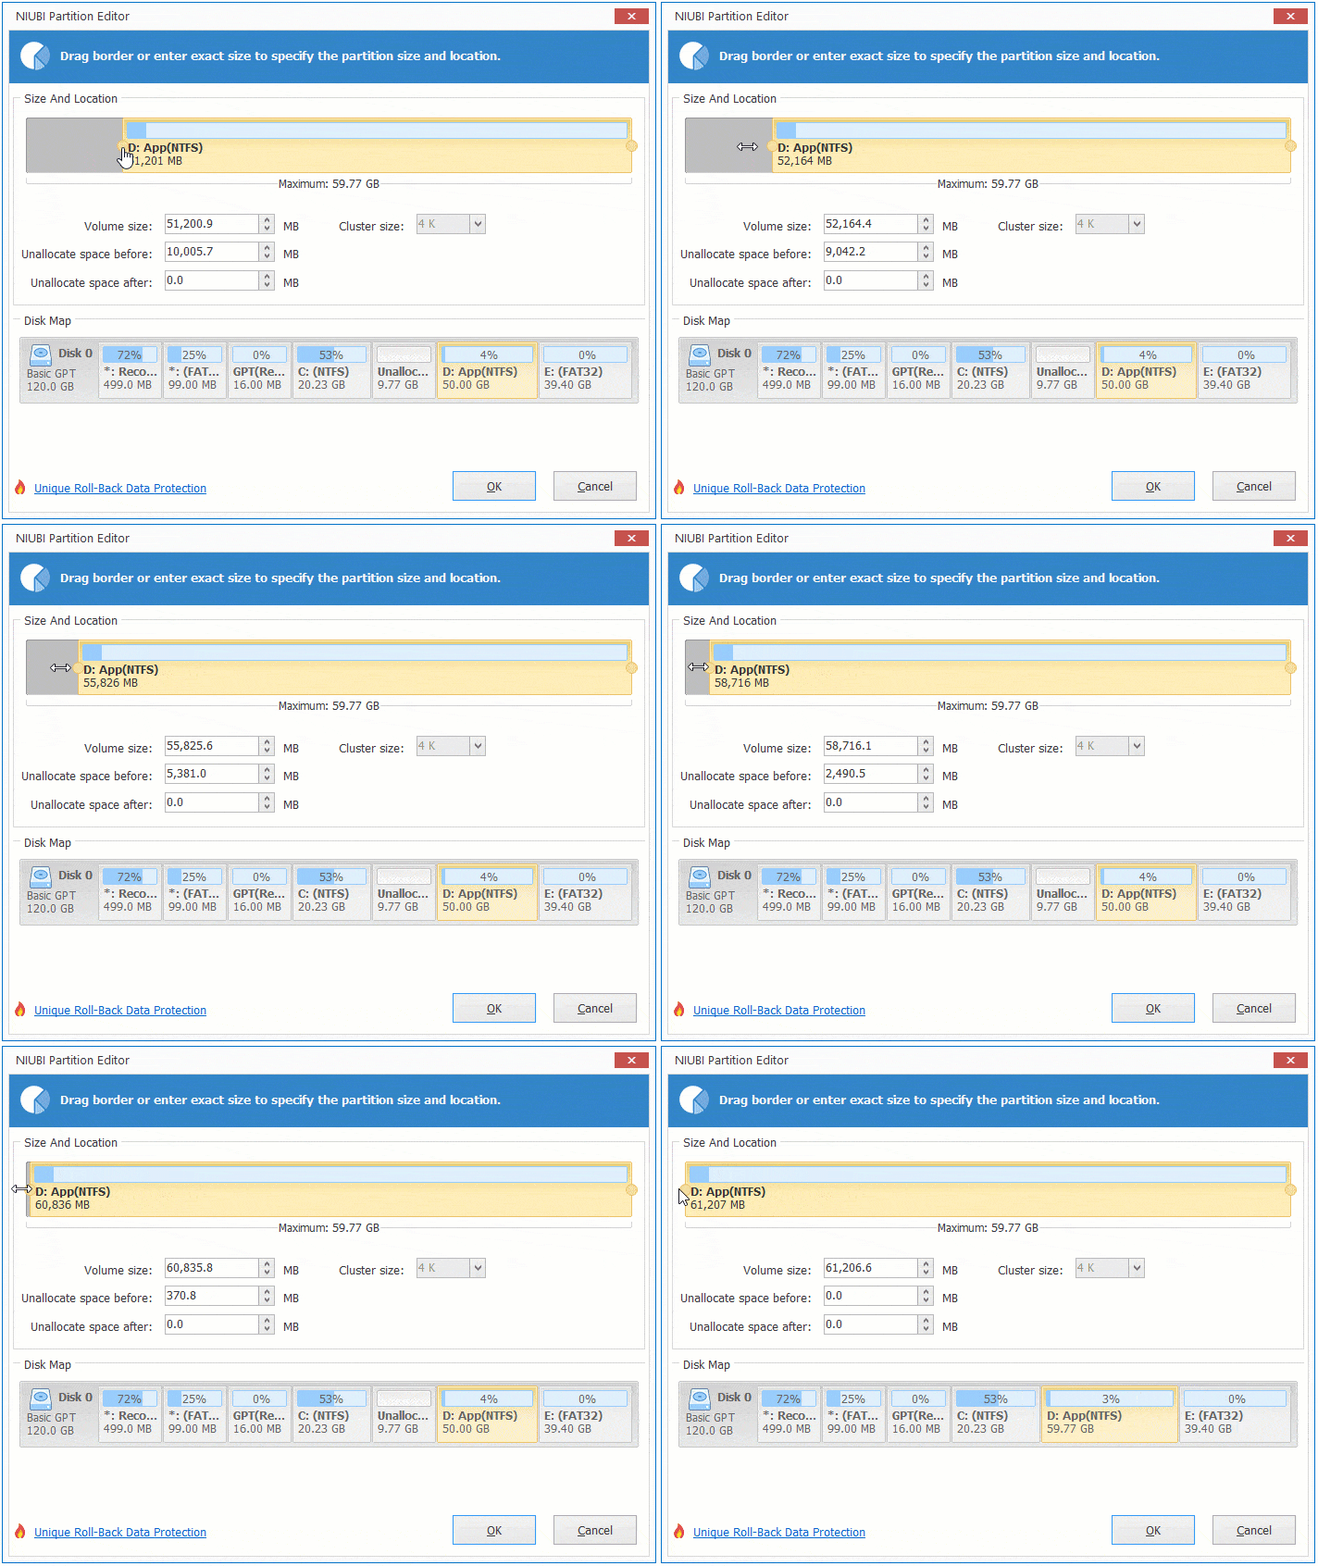
Unlike Disk Management, which executes changes immediately, NIUBI Partition Editor is designed to work in virtual mode. The operations you perform will be listed as pending on the bottom left. Real disk partitions will not be modified until you click the "Apply" button to confirm.
Besides shrinking partitions in Windows 11/10/8/7/Vista/XP, NIUBI Partition Editor helps you move, merge, copy, defrag, wipe, check, scan, convert partitions, and much more.
 © 2009 - NIUBI Technology All Rights Reserved. |