If there is only a C drive on your server system disk, you can shrink volume layouts to create separate partitions for programs. Storing all files and applications on the system partition is not recommended. When database or exchange drives are getting full, you can reduce alternative drives to reallocate free capacity. This article introduces both native and software methods to shrink volume in Windows Server 2019/2022 without losing data.
How to Shrink Volume in Windows Server 2019/2022 without Software
Like previous releases, Windows Server 2019 and 2022 include the native Disk Management utility to manage disk layout structures. This system program provides a built-in tool to shrink NTFS partitions without losing data. However, compared to professional server partition software options, native configurations enforce multiple functional restrictions. Built-in disk management components may carry operational stability risks when modifying raw drive structures. Administrators should exercise extreme caution if a hard drive contains a mix of primary and logical partitions.
Steps to shrink volume in Windows Server 2019/2022 with Disk Management:
- Press Windows + X simultaneously on your keyboard and select Disk Management from the configuration list.
- Right-click your targeted NTFS partition and choose Shrink Volume from the context menu options.
- Enter your desired storage reduction value in megabytes and click the Shrink button to execute. If you leave the input field empty, the utility automatically allocates the maximum available unallocated space.
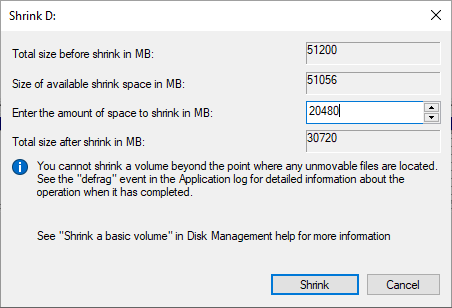
The reduction routine processes quickly, generating a clean unallocated space block directly on the right boundary of the adjusted drive.
Limitations of the Shrink Volume Function in Windows Server 2019/2022
As detailed above, built-in components introduce several operational bottlenecks when modifying server partition layouts.
1. Only NTFS Partitions Are Supported
The integrated utility exclusively supports shrinking partitions formatted with the NTFS filesystem architecture. FAT32 data pools and alternative allocation tables are entirely unsupported. When right-clicking a FAT32 partition layout, the option to contract boundaries appears grayed out.
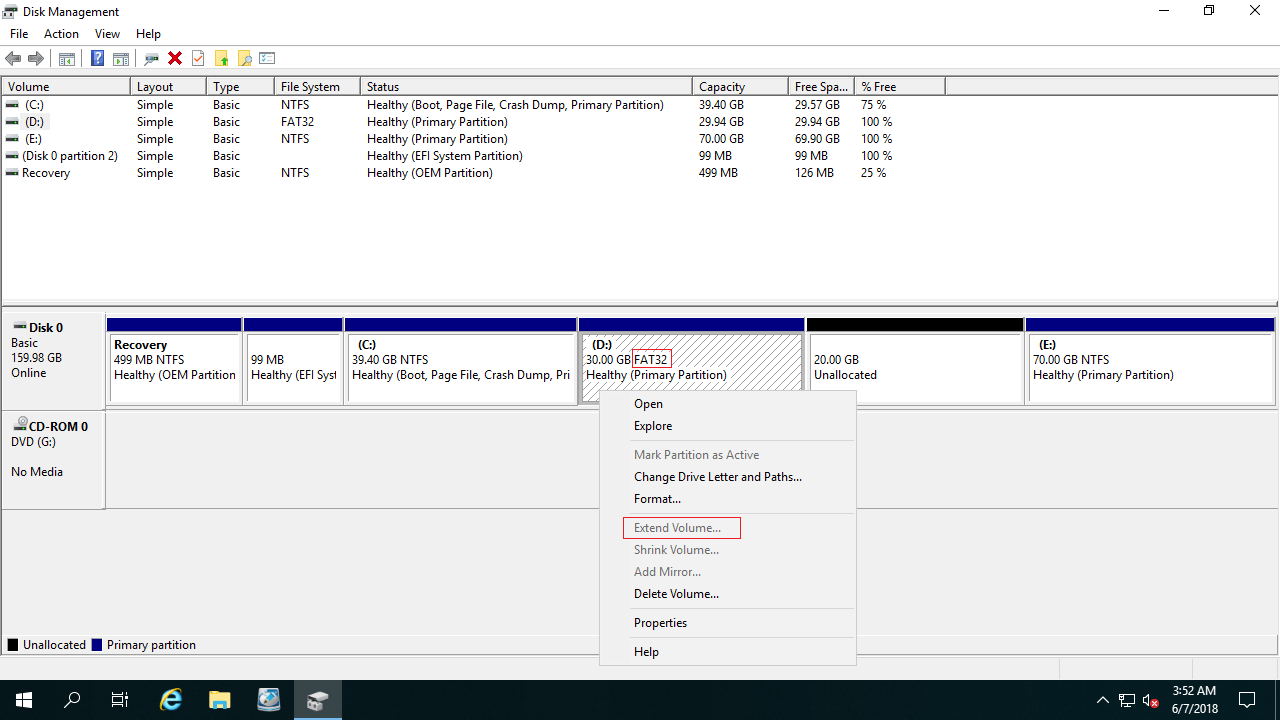
2. Partitions Can Only Be Shrunk toward the Left
When reducing boundaries via native configurations, the tool contracts storage space exclusively from right to left. This operation forces newly generated unallocated blocks to reside strictly on the right side of the modified drive. The configuration wizard provides no alternate pathway except inputting a specific capacity reduction value.
3. Volumes Cannot Be Shrunk beyond the Point of Unmovable Files
The shrink interface explicitly warns that you cannot reduce volume sizes beyond the location of unmovable data markers.
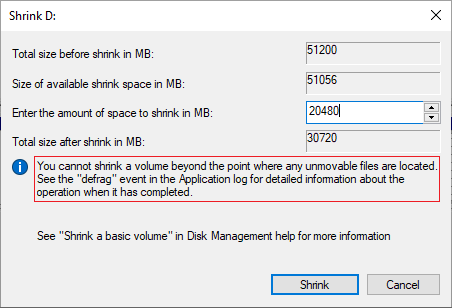
For example, consider a drive configuration split into four distinct sectors. If system placement flags sit inside sector 3, the engine cannot contract boundaries into sector 1 or 2.

This restriction prevents administrators from reclaiming full drive capacity despite having substantial available sectors. These unmovable files typically include pagefiles, hibernation containers, and large system restoration logs.
Better Way to Shrink Partition in Windows Server 2019/2022
Compared to native utilities, NIUBI Partition Editor handles both NTFS and FAT32 filesystem structures seamlessly. The software can generate clean unallocated space blocks on either the left or right boundary during size reduction. Furthermore, it automatically moves unmovable file segments, allowing you to shrink your storage drive to its absolute minimum limits. The utility can also safely move and merge Unallocated space into either contiguous or non-adjacent partitions on the same physical disk.
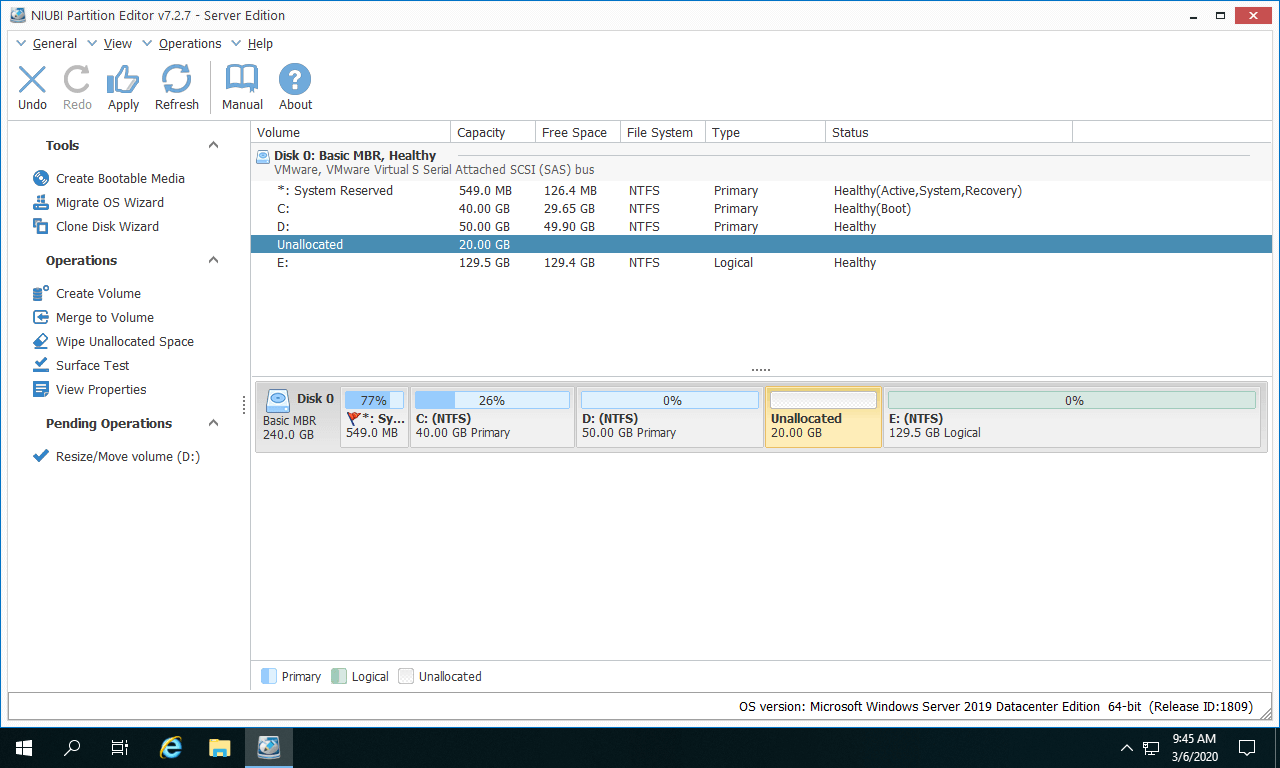
After launching the partition package, you can view your complete drive topography, volume structures, and available data pools within the master console dashboard layout.
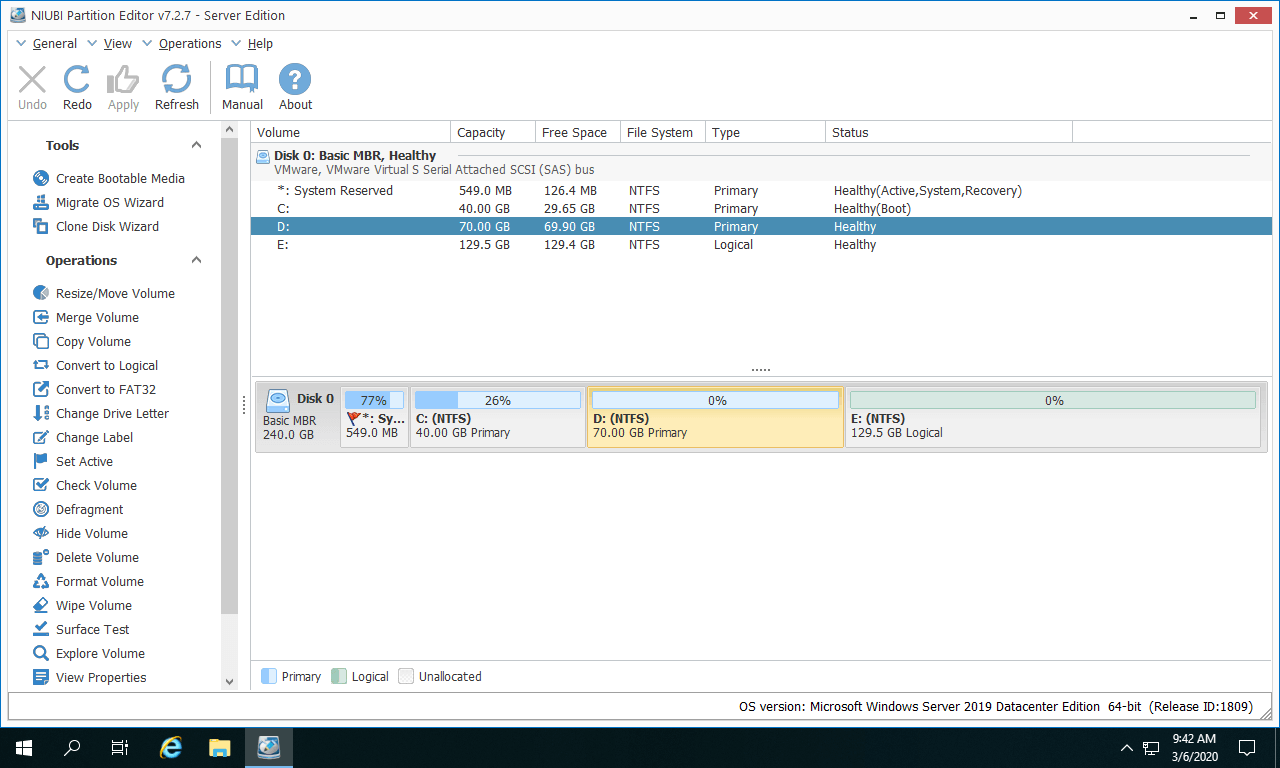
Right-click the drive that you want to shrink (here is D) and select "Resize/Move Volume". In the pop-up window, you have two configuration pathways:
If you drag the left border rightward or input a value into the "Unallocated space before" field:
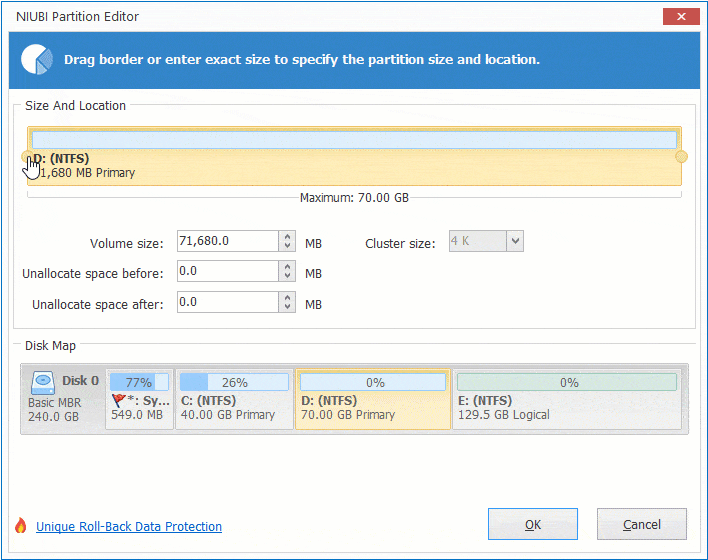
The unallocated space is generated directly on the left boundary of that partition layout block.
If you drag the right border leftward or input a value into the "Unallocated space after" field:
The unallocated space is generated directly on its right edge container layout.
Steps to shrink volume in Windows Server 2019/2022 without losing data via video guide:
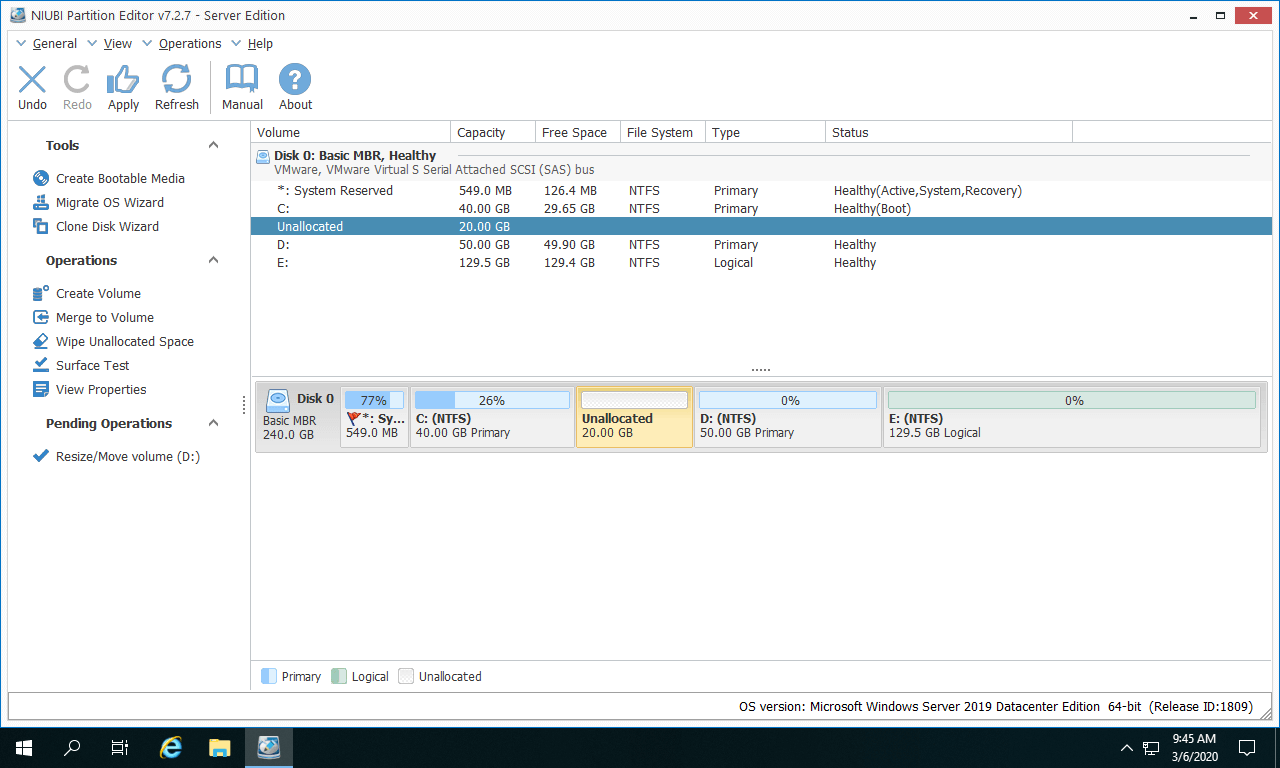
Once the unallocated sector block is created, right-click the empty space and choose "Create Volume" to provision a new drive. If your primary goal is to extend a partition using this reclaimed capacity, right-click that specific drive and open the "Resize/Move Volume" option. Drag the layout border across the map to absorb the unallocated blocks immediately.
Beyond executing basic partition modifications in Windows Server 2019, 2022, and 2025, NIUBI Partition Editor provides a comprehensive toolkit for routine sector management. The utility simplifies disk copying, volume merging, filesystem conversion, data erasing, and block surface scanning routines safely and efficiently.