When the system disk runs out of free space on a production machine, administrators can clone files to a larger hard drive to migrate applications safely. This strategy runs significantly faster and easier than executing traditional storage image backup and recovery workflows. If you deployed your system framework on an aging mechanical drive, replacing it with a solid-state container offers massive performance improvements. To update storage arrays efficiently, utilizing an online utility running file-level replication ensures maximum processing speeds. This article explains how to clone disk in Windows Server 2019/2022 safely.
Sector-to-sector clone VS file-to-file copy
Executing a physical block duplication across Windows Server 2019/2022 environments generally relies on two primary methodologies: sector-to-sector cloning and file-to-file copy operations.
Running a raw sector-level copy is exceptionally slow because every individual cluster on the destination disk must match the source configuration exactly. Under this restrictive framework, you cannot change partition size parameters to fit an alternative disk model. For example, if you duplicate a 250GB storage drive onto a 500GB volume, the initial 250GB area copies identically, while the remaining capacity displays as unallocated sectors.
Conversely, a file-level replication runs significantly faster because the underlying processing engine operates directly within the file system layout. This method ensures that complete datasets are migrated securely while allowing sector coordinates to adjust naturally. An additional operational benefit of file-level processing is that you can dynamically resize drive boundaries on the target disk container during the migration.
In the vast majority of server upgrade scenarios, performing a time-consuming sector-to-sector clone is entirely unnecessary.
How to clone Windows Server 2019/2022 disk to SSD/larger HDD
- Download and launch NIUBI Partition Editor to view your local drive topology, volume structures, and hardware layout information within the main console.
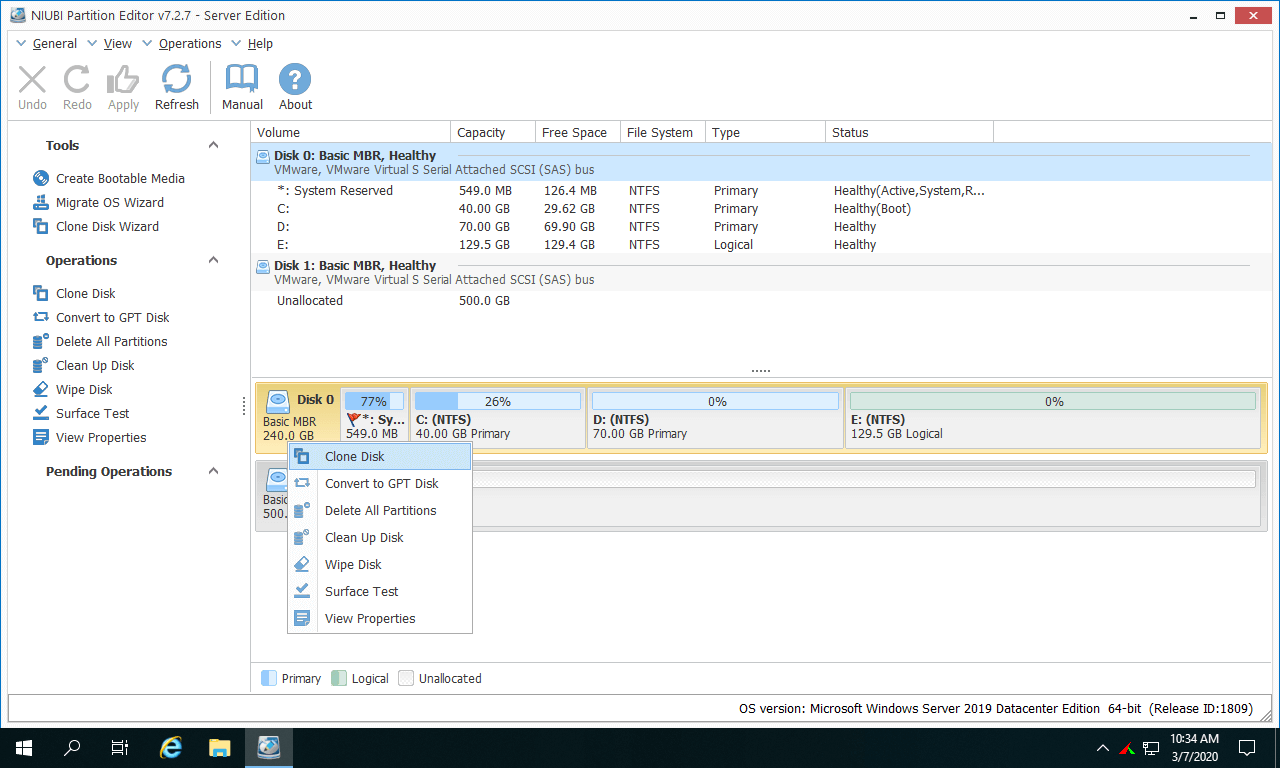
- Right-click the front of your targeted source drive and select the "Clone Disk" option.
![Clone Disk]()
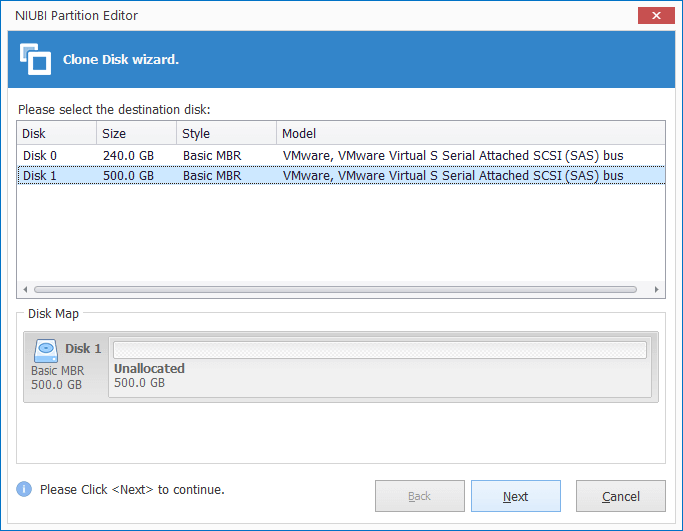
- Select your destination disk container from the list and click Next. (Note: Existing partitions on the target drive will be wiped; ensure vital files are backed up before proceeding).
![Select disk]()
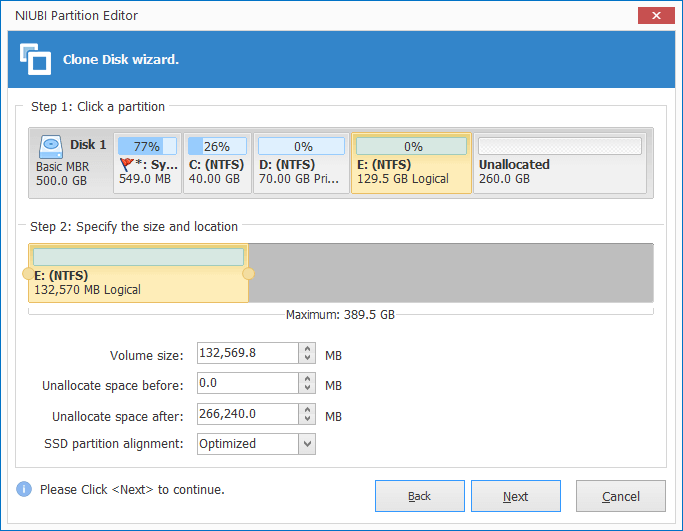
- Modify volume sizes and boundary layouts on the graphical map, starting from the last partition. For example, dragging the right border of the E drive rightward absorbs contiguous unallocated space, while dragging the center shifts the entire partition layout rightward.
![Edit partition]()
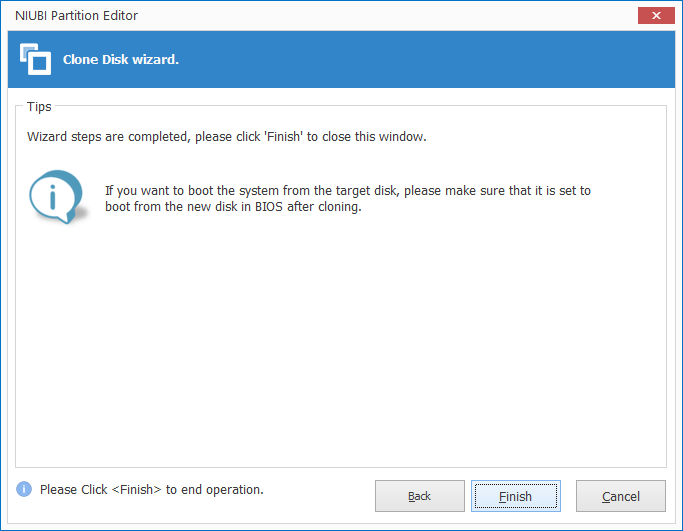
- Review your staged layout parameters in the confirmation window and click Finish.
![Confirm]()
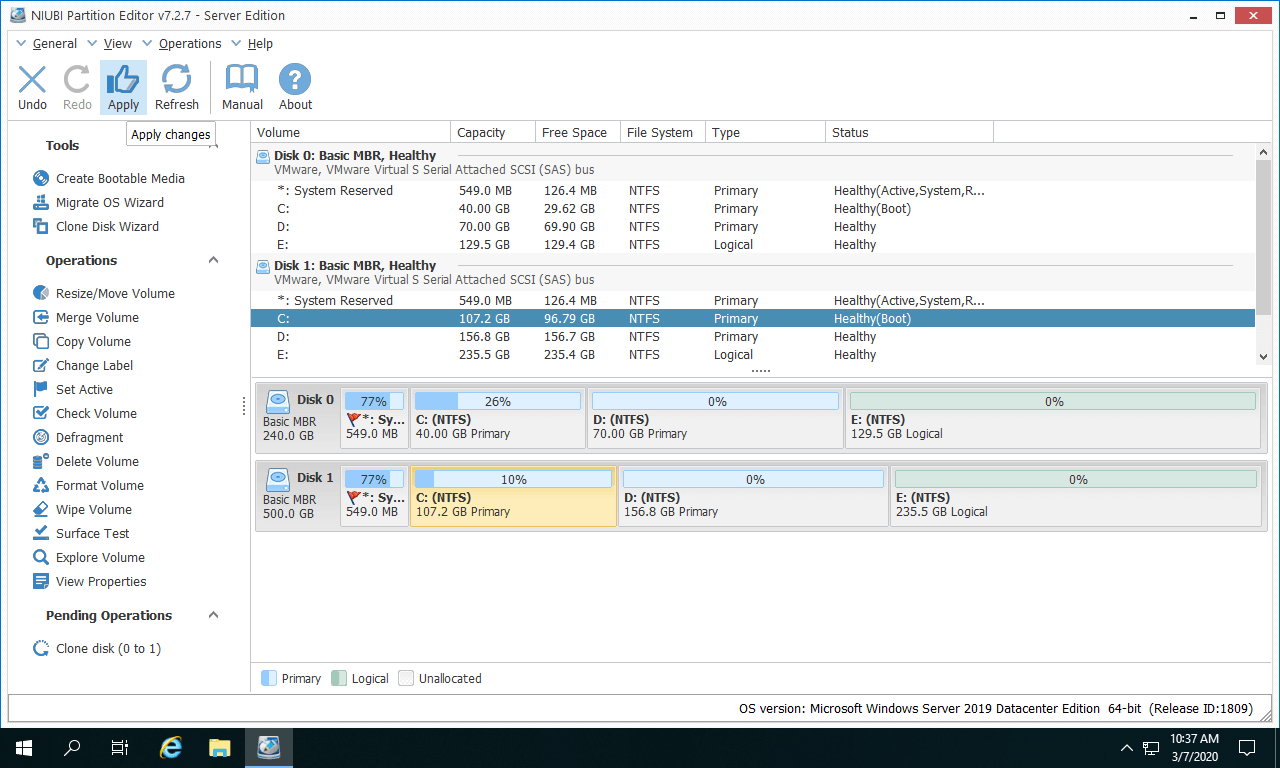
- Click the Apply icon located in the upper-left corner of the master workspace to authorize and commit the pending execution blocks.
![Apply]()
Steps to clone Windows Server 2019/2022 disk partitions via video guide:
The source and target disks operate identically whether configured as standard mechanical HDDs, high-speed SSDs, or complex hardware RAID arrays.
Main benefits to clone disk in Windows Server 2019/2022 with NIUBI Partition Editor:
- Premium execution speeds - Beyond optimizing file system routing layers, the software uses a proprietary file-moving algorithm to accelerate drive data migration 30% to 300% faster than alternative utilities.
- Online Hot Clone support - Replicate storage configurations directly inside live environments without a server reboot, ensuring zero infrastructure service disruptions.
- Rapid disaster recovery fallbacks - Maintaining regular storage copies allows administrators to secure bootable clones. If the primary operating disk experiences a hardware failure, you can swap connections and restore operations immediately.
- Flexible target drive provisioning - Migrate operating layouts seamlessly onto smaller or larger storage media. When downscaling onto a smaller disk, the target drive container capacity simply needs to exceed the active used space of the source partitions.
How to copy Server 2019 partition to another disk
To safely copy an individual partition to an alternative drive layout in Windows Server 2019/2022, an unallocated block must reside on the targeted storage media. If your destination drive lacks available sectors, you can shrink a partition to create room. This unallocated target space container must match or exceed the total active used capacity of the primary source partition.
Steps to copy partition in Windows Server 2019/2022 with NIUBI Partition Editor:
- Right-click the targeted source volume (such as drive D) and select the "Copy Volume" feature.
- Select your prepared destination unallocated block space on the target disk and click Next.
- Adjust the partition size, physical location, and drive properties on the graphical topology map.
- (Optional) Right-click the original source volume and select "Change Drive Letter" to reassign its letter path within the system.
- (Optional) Right-click the newly migrated target partition, launch "Change Drive Letter," and map it to letter D from the configuration panel.
- Click the Apply option in the top-left area to commit the staged data transfer tasks securely.
On many production servers, drive D targets core application paths. Following the migration, reassigning the letter path ensures your services execute smoothly from the new drive. For basic data backup volumes, you can skip the letter reassignment phase.
Steps to copy partition on Windows Server 2019/2022 via video demonstration:
Beyond cloning disk partitions across Windows Server 2019, 2022, and 2025 platforms, NIUBI Partition Editor provides a comprehensive toolkit for complete disk management, partition merging, filesystem conversion, data erasing, and block surface scanning routines.